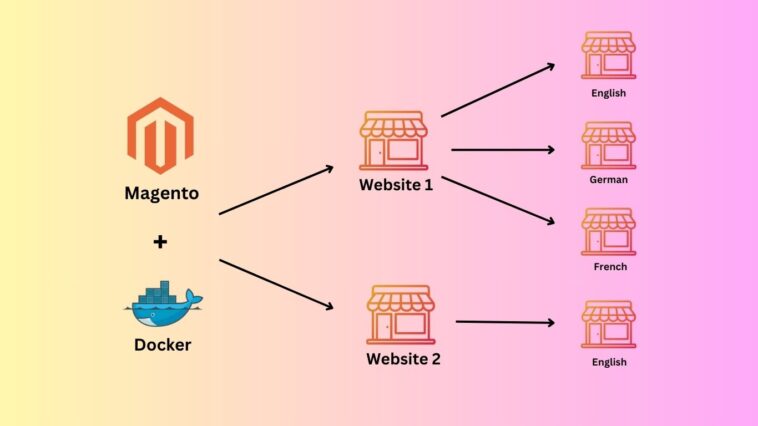
The projects I work on are often multi-store installations. Once I had Magento running with Docker, the next challenge was turning it into a multi-store setup. It wasn’t quite as simple as it may seem at first glance. After a few days of Googling and conversations with ChatGPT, I managed to solve it, so I put together this article with my observations and a practical guide on how to do it.
The prerequisite is a Magento store already running with Docker. I described the process in this article. Before you get going, start the containers with bin/start.
Admin panel
We’ll start in the admin panel. Go to Stores -> Settings -> All Stores and create a new store. In most cases I create the new store at the “website” level, because I want a separate catalog and discount coupons. So I created a new website, store and store view. It’s important to remember the code of this new website. We’ll need it later when configuring nginx.
Then go to Stores -> Settings -> Configuration -> General -> Web, switch the scope in the dropdown at the top to the new website and change the Base URL (both unsecure and secure).
If you need to configure a different theme for the new website, you can do that in Content -> Design -> Configuration. If your newly created store doesn’t show up in the grid, try running this from the command line
bin/magento indexer:reindex
and after a refresh it should appear in the grid.
nginx configuration
Now we need to make quite a few changes to the nginx configuration. First go to the GitHub repository at https://github.com/markshust/docker-magento/tree/master/images/nginx and find the version of the nginx image you’re using. You’ll find it in compose.yaml, under the app section of the project you previously set up with Docker.
Then, on GitHub, open the directory for that version, go into conf, and the file you’re interested in is default.conf. That’s the base configuration we’ll be extending.
But first, open compose.yaml itself and replace the original image, e.g.
image: markoshust/magento-nginx:1.24-0
with the line
build: images/nginx
This tells Docker that, instead of the original prebuilt image, it should build the container from your own image in the images/nginx subdirectory, which we’ll put together in a moment.
So create an images/nginx subdirectory in the root directory of your project (where the other subdirectories such as bin and src are). In this new directory, create a file called Dockerfile (no extension). This is the file where we define our new image. It’s very simple, with just 2 lines:
FROM markoshust/magento-nginx:1.24-0 # this is the base image we build on
COPY ./conf/default.conf /etc/nginx/conf.d/ # here we overwrite the original default.conf with the new one we’ll create in a moment.
Now, inside images/nginx, create another subdirectory called conf and in it a file named default.conf. Take the contents of this file from the link we just found on GitHub, e.g. https://github.com/markshust/docker-magento/blob/master/images/nginx/1.24/conf/default.conf.
We’ll make a few changes to the file.
Between the upstream and server sections, add a new section that defines the value of the $MAGE_RUN_CODE variable for each domain. For example:
map $http_host $MAGE_RUN_CODE {
    default website_german;
    store2.com website_austrian;
}
where website_german is the website-level code of the default store (domain store1.com from here on) and website_austrian is the one we just created in Stores -> Settings -> All Stores (domain store2.com from here on).
In the following server section, add a line that defines both domains, so it looks something like this
server {
  listen 8000;
  server_name store1.com store2.com;
  return 301 https://$host$request_uri;
}
This redirects from the insecure URL to https. Next, we need to define as many server sections as there are stores (domains) in the backend. In this example I define 2 domains. Copy the contents from the original file on GitHub, so the whole section will look something like this
server {
  listen [::]:8443 ssl http2;
  listen 8443 ssl http2;

  server_name store1.com;

  ssl_certificate /etc/nginx/certs/store1_com.crt;
  ssl_certificate_key /etc/nginx/certs/store1_com.key;

  set $MAGE_ROOT /var/www/html;
  set $MAGE_RUN_TYPE website;

  fastcgi_buffer_size 64k;
  fastcgi_buffers 8 128k;

  client_max_body_size 100M;

  location /livereload.js {
    proxy_set_header Host $host;
    proxy_pass http://phpfpm:35729/livereload.js;
  }

  location /livereload {
    proxy_http_version 1.1;
    proxy_set_header Upgrade $http_upgrade;
    proxy_set_header Connection "Upgrade";
    proxy_pass http://phpfpm:35729/livereload;
  }

  include /var/www/html/nginx[.]conf;
}

server {
  listen [::]:8443 ssl http2;
  listen 8443 ssl http2;

  server_name store2.com;

  ssl_certificate /etc/nginx/certs/store2_com.crt;
  ssl_certificate_key /etc/nginx/certs/store2_com.key;

  set $MAGE_ROOT /var/www/html;
  set $MAGE_RUN_TYPE website;

  fastcgi_buffer_size 64k;
  fastcgi_buffers 8 128k;

  client_max_body_size 100M;

  location /livereload.js {
    proxy_set_header Host $host;
    proxy_pass http://phpfpm:35729/livereload.js;
  }

  location /livereload {
    proxy_http_version 1.1;
    proxy_set_header Upgrade $http_upgrade;
    proxy_set_header Connection "Upgrade";
    proxy_pass http://phpfpm:35729/livereload;
  }

  include /var/www/html/nginx[.]conf;
}
in both sections, it’s important that from the original line
listen [::]:8443 ssl http2 ipv6only=on;
you remove
ipv6only=on
Otherwise the container kept throwing an error for me.
I also changed the path to the SSL certificates, which we’ll create in a moment. Each domain needs its own certificates. I also set the $MAGE_RUN_TYPE variable to “website”, since I decided the domain would point to the website scope. The other option would be to set it to “store”, in which case you also have to change the map section so that the $MAGE_RUN_CODE variable contains the store view-level code.
The last configuration file we need to modify is nginx.conf itself. Our Docker installation has a volumes definition in compose.dev.yaml that syncs the contents of src/nginx.conf.sample to /var/www/html/nginx.conf in the container. It’s the standard nginx.conf file as recommended by Magento.
First, create a new file named nginx.conf in the “src” directory and copy the contents of nginx.conf.sample into it. Then, in compose.dev.yaml, set it to sync this newly created nginx.conf instead, so the line will look like this
./src/nginx.conf:/var/www/html/nginx.conf:cached
In the new nginx.conf file, scroll all the way down to the definition
location ~ ^/(index|get|static|errors/report|errors/404|errors/503|health_check).php$
and before the last include, add these two parameters we defined a moment ago
fastcgi_param MAGE_RUN_TYPE $MAGE_RUN_TYPE;
fastcgi_param MAGE_RUN_CODE $MAGE_RUN_CODE;
The whole section will then look roughly like this
# PHP entry point for main application
location ~ ^/(index|get|static|errors/report|errors/404|errors/503|health_check)\.php$ {
    try_files $uri =404;
    fastcgi_pass   fastcgi_backend;
    fastcgi_buffers 16 16k;
    fastcgi_buffer_size 32k;

    fastcgi_param  PHP_FLAG  "session.auto_start=off \n suhosin.session.cryptua=off";
    fastcgi_param  PHP_VALUE "memory_limit=756M \n max_execution_time=18000";
    fastcgi_read_timeout 600s;
    fastcgi_connect_timeout 600s;

    fastcgi_index  index.php;
    fastcgi_param  SCRIPT_FILENAME  $document_root$fastcgi_script_name;
    fastcgi_param  MAGE_RUN_TYPE $MAGE_RUN_TYPE;
    fastcgi_param  MAGE_RUN_CODE $MAGE_RUN_CODE;
    include        fastcgi_params;
}
If you haven’t yet defined the store2.com domain in /etc/hosts, do it now, the same way you have it for store1.com.
SSL certificates
The last thing needed for everything to work properly is generating SSL certificates for both domains. Normally there’s the bin/setup-ssl script for this, but at the time of writing it didn’t work for multiple domains. It always generated a certificate for just one domain and overwrote nginx.key and nginx.crt with the values for that domain.
Based on the discussion on this topic (https://github.com/markshust/docker-magento/issues/1172), where, by the way, you’ll also find my comment with the full default.conf, I created a new bash script that goes into bin/setup-ssl-new. So create this file and copy the following into it
#!/usr/bin/env bash
[ $# -eq 0 ] && echo "Please specify at least one domain (ex. mydomain.test)" && exit 1

# Generate certificate authority if not already setup
if ! bin/docker-compose exec -T -u root app cat /root/.local/share/mkcert/rootCA.pem | grep -q 'BEGIN CERTIFICATE'; then
  bin/setup-ssl-ca
fi

for DOMAIN in "$@"; do
  # Generate a unique file prefix based on the domain name
  DOMAIN_WITHOUT_PORT=$(echo "$DOMAIN" | cut -d ':' -f1)
  CERT_PREFIX=$(echo "$DOMAIN_WITHOUT_PORT" | tr '.' '_')

  # Generate the certificate for the specified domain
  bin/docker-compose exec -T -u root app mkcert -key-file "${CERT_PREFIX}.key" -cert-file "${CERT_PREFIX}.crt" "$DOMAIN_WITHOUT_PORT"

  # Check if the certificates were created successfully
  if bin/docker-compose exec -T -u root app test -f "${CERT_PREFIX}.key" && bin/docker-compose exec -T -u root app test -f "${CERT_PREFIX}.crt"; then
    echo "Moving key and cert for $DOMAIN to /etc/nginx/certs/..."
    bin/docker-compose exec -T -u root app chown app:app "${CERT_PREFIX}.key" "${CERT_PREFIX}.crt"
    bin/docker-compose exec -T -u root app mv "${CERT_PREFIX}.key" "${CERT_PREFIX}.crt" /etc/nginx/certs/
  else
    echo "Error: Certificates for $DOMAIN were not created."
  fi
done

# Restart nginx to apply the updates
echo "Restarting containers to apply updates..."
bin/restart
Then run it with
bin/setup-ssl-new store1.com store2.com
The script iterates over all the domains and creates a pair of certificates in the container, store1_com.crt and store1_com.key for the store1.com domain, and likewise store2_com.crt and store2_com.key for the store2.com domain.
Running the script should also restart the containers so the new changes take effect. The app container should also be rebuilt, since we changed its image in compose.yaml.
If you make any changes to the Dockerfile in the future, you’ll need to rebuild the image with
docker compose build
I hope this guide has helped you successfully turn your previous single-store Magento installation into a multi-store one.